.jpeg)
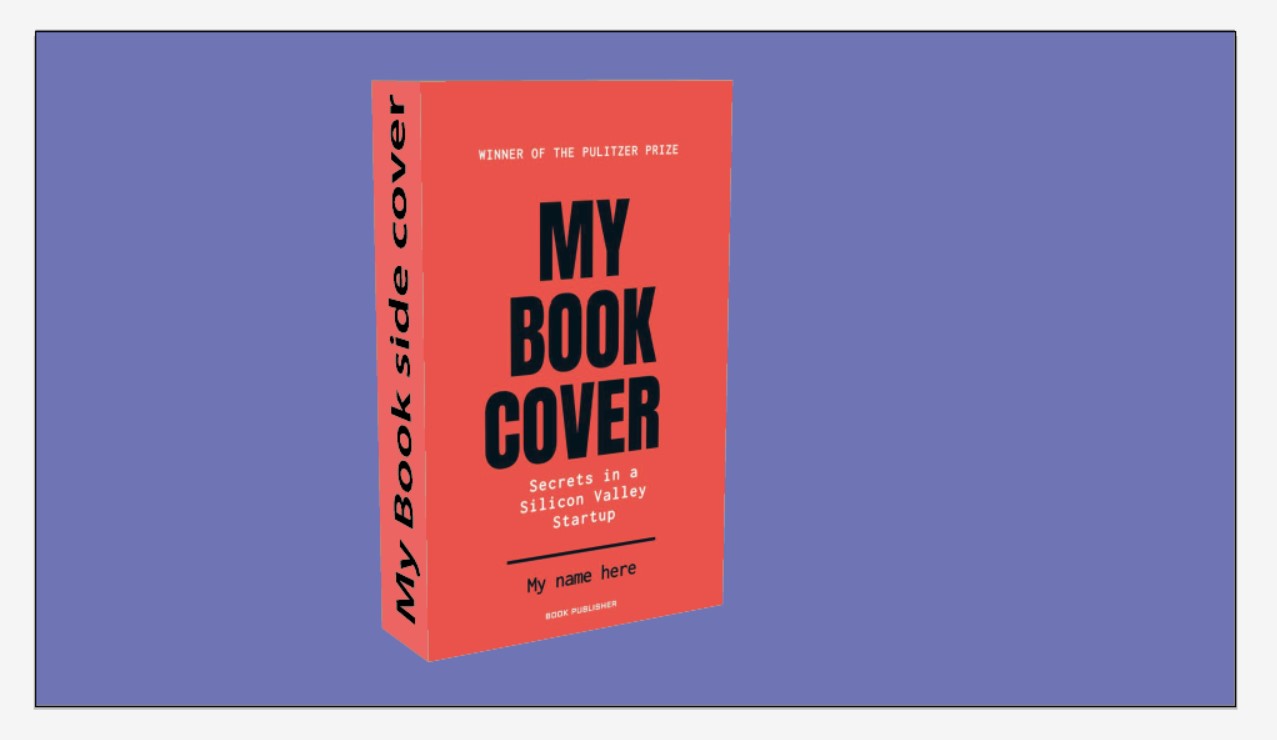
Mockup Design: Mockup design is a perspective view of any object i.e. how it looks in the real world. Basically, in a mockup design, we paste images into the frame to make them look natural.
Mockup designs are used not only in book covers but also in posters made to promote many products, which look more accurate and attractive than the normal photo and attract the attention of the customer.
These days we can see mockup designs on many eCommerce websites product images, Newspapers, and Magazine posters, so how can we make it for ourselves, in this article, I will tell you how to do it in Illustrator which is a graphics design software from Adobe.
We can also make it in Photoshop but if we want more and more accurate then we will do it in illustrator which gives us the freedom to make any shape
Concept of Design: we will do the mockup design step by step in illustrator before that let's talk a little bit about the concept of designing.
The concept of designing a mockup is very simple. First of all,
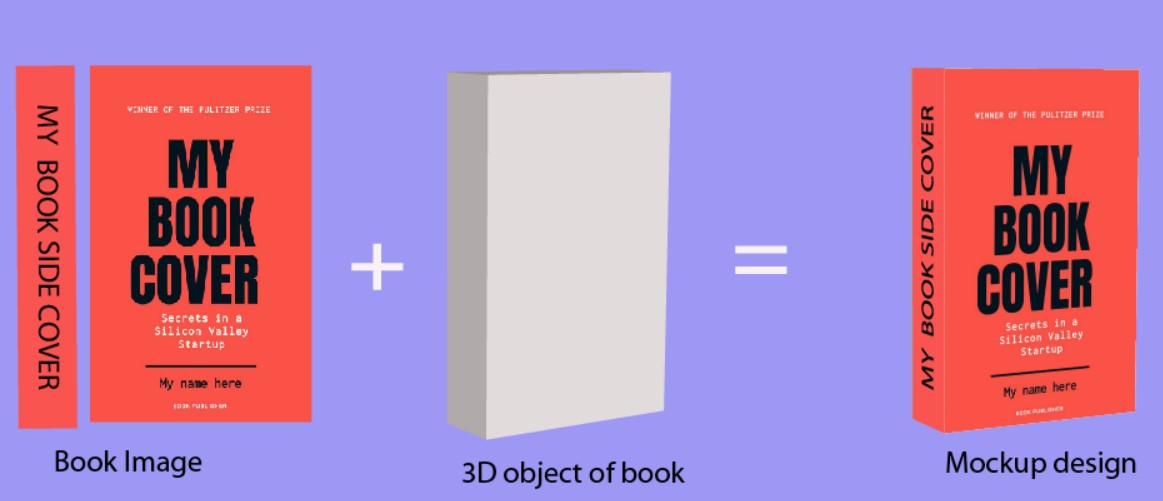
we will take the image of the object whose design is to be made. After that, we will prepare the 3d shape of the kind of mockup design in the illustrator and then finally patch the image of the object in that 3d shape. so we only have to do three things
- create a digital image of which we have to make a mockup design
- make a 3d shape of the mockup design as we want
- Lastly, the object image is to be patched in 3d Shape
So let's now make it in illustrator.
the steps for it are as follows, here we will make a cover design of book
- Take a new file and import the cover image and side cover image of the object
- convert both images to symbol properties
- Draw a rectangle of the cover size of the book and Convert it into a 3d shape
- patch book cover image and side cover image on 3d shape
Now we will understand each step with the help of a snapshot, so open your illustrator and follow each step with me.
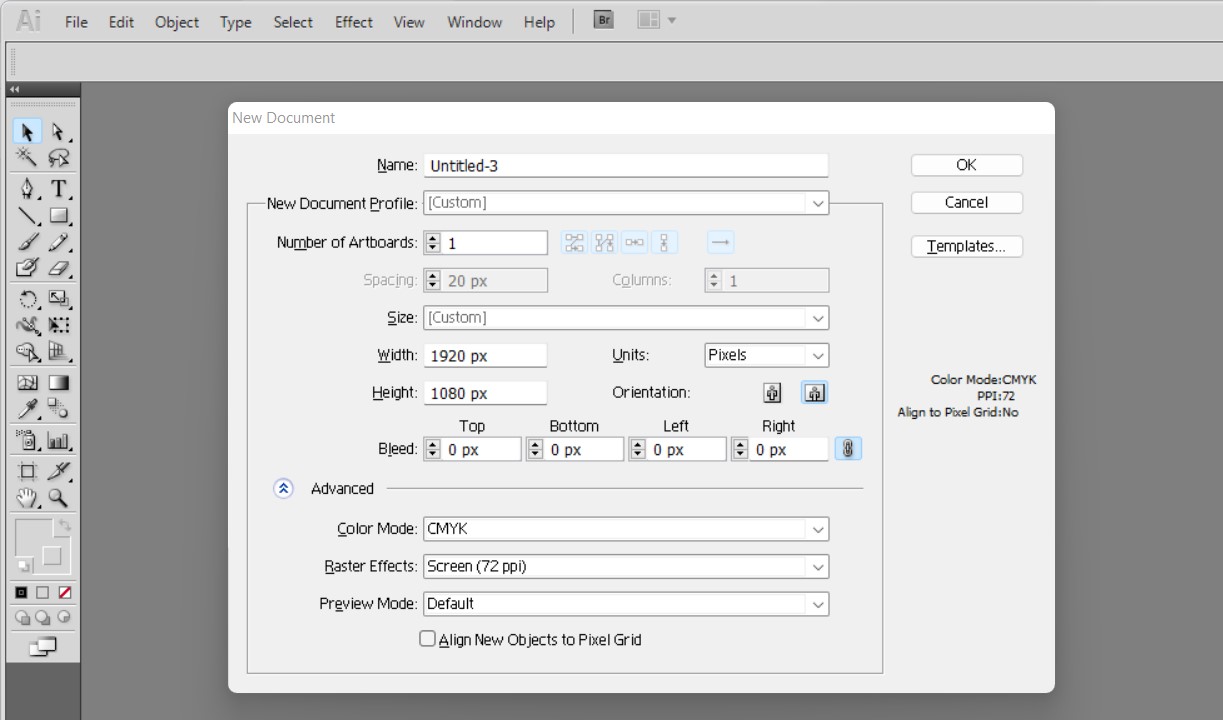
Step 1: Take a new file and import the cover image and side cover image of the object: In this step go to the file option and click on new or press the short key CTRL+N

After that, the file configuration option will come. here we will take file size in pixels where width is 1920 and height 1080 and raster effect 72ppi and then click ok
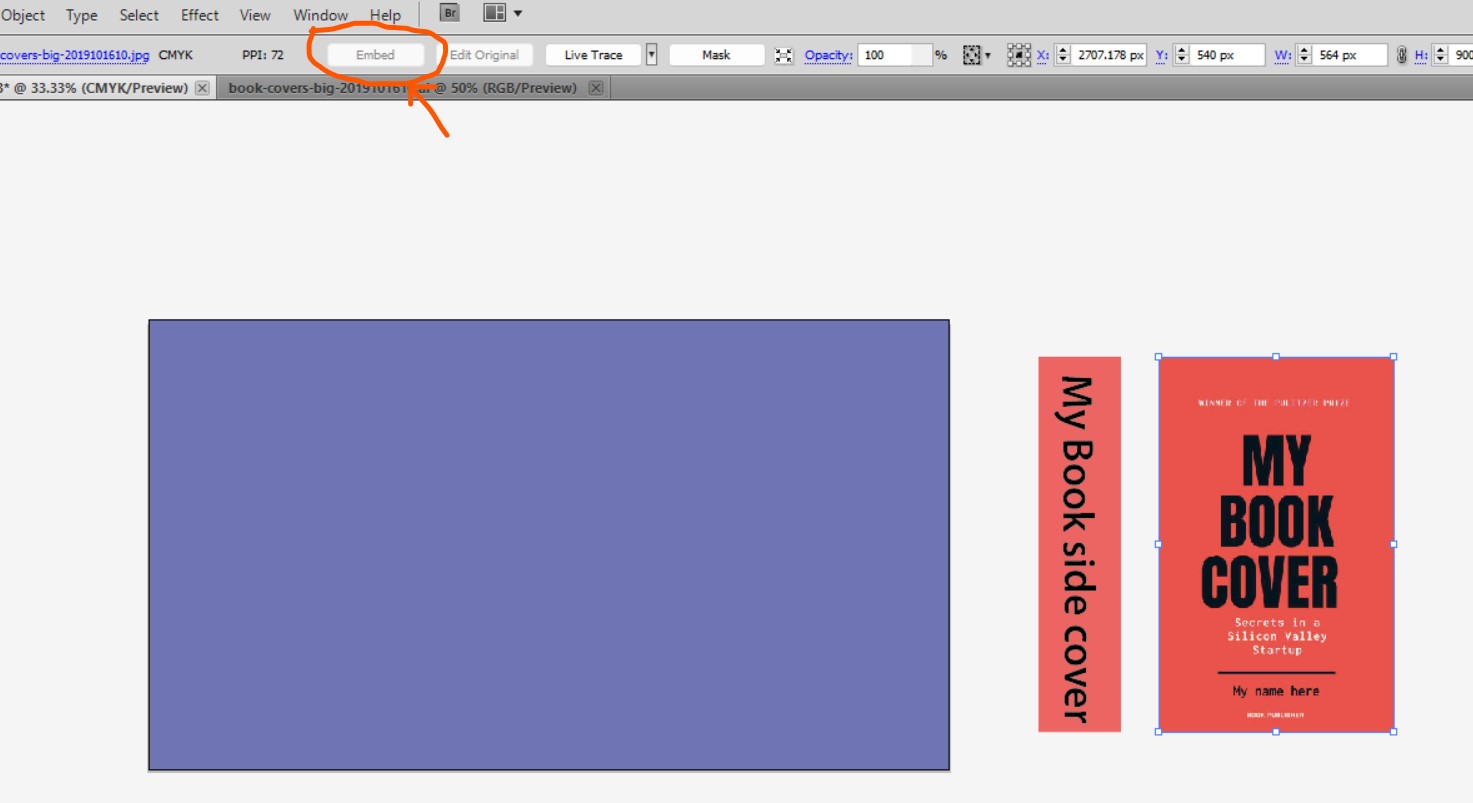
After this our workbook will open, now we will import both the cover image and the side cover image, to import the image file again go to file option and click on open, which will open a window to select the file, Another way is to click and hold the image and drag and drop it on the workbook, our file will be imported.
Now after importing the image file, we will embed it because, without embed, no operation is allowed in illustrator, the embed option comes at the top, as you can see in the image given below.
In the art book, we have drawn a rectangle and given it a blue color, and have locked its layers, these are only for the background. You can add a different background or a custom image if you want
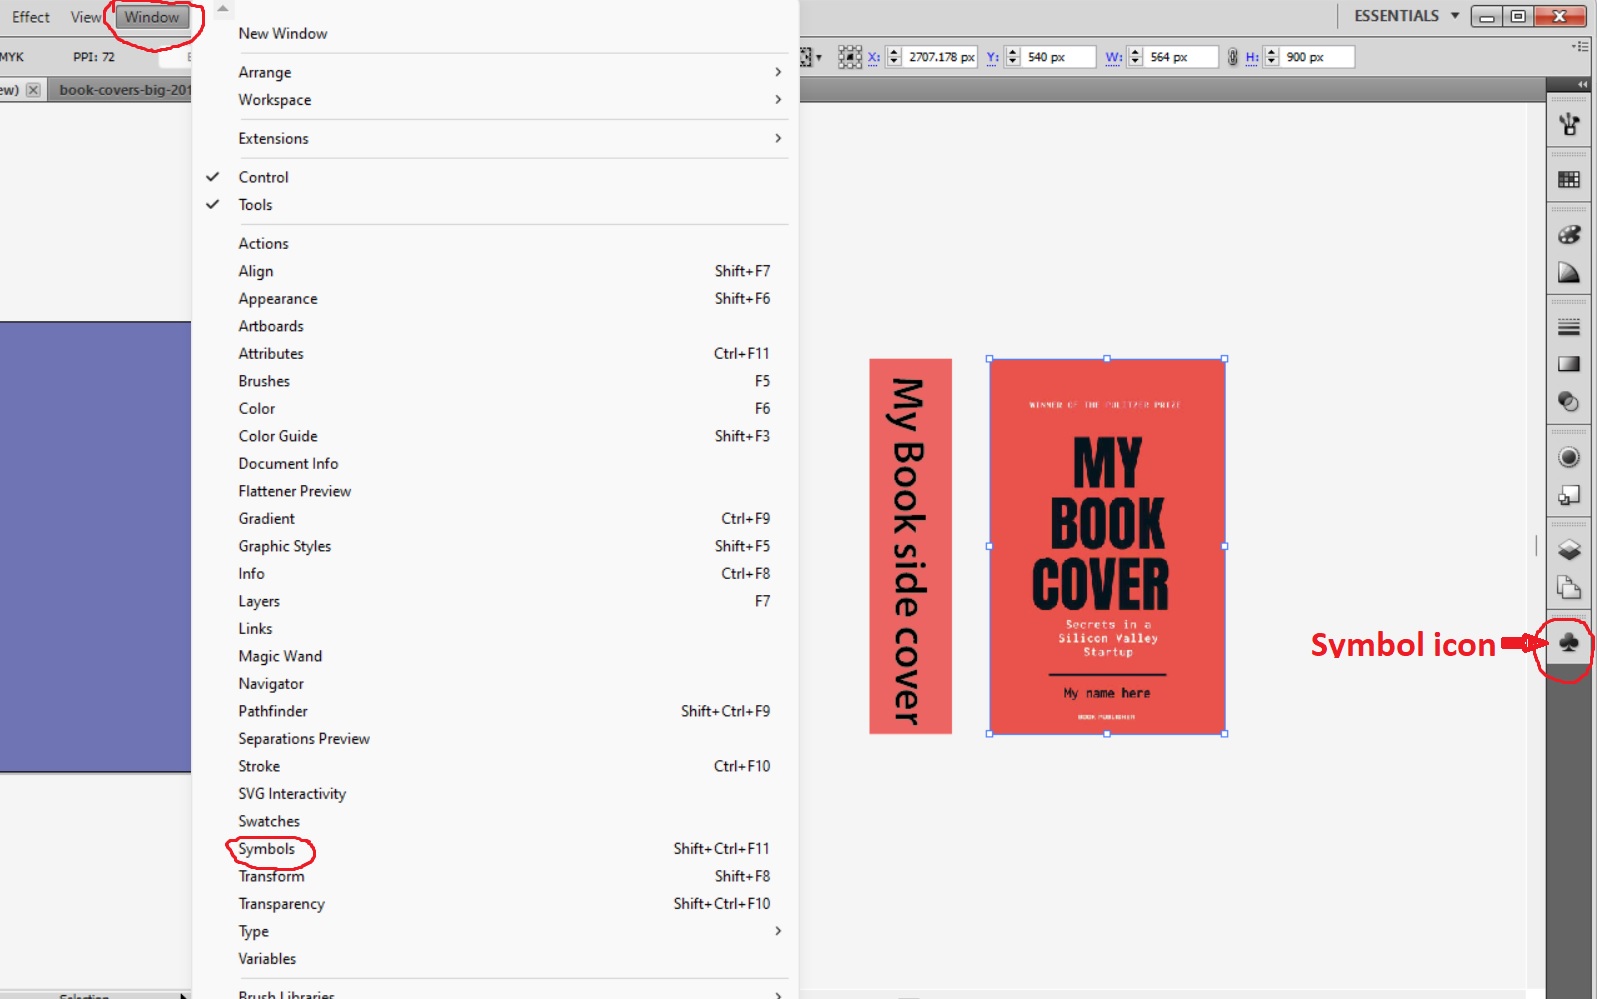
Step 2: convert both images to symbol properties: Now we will make both the images as symbols, to do this a symbol icon has been given in the right side, if the symbol icon is not showing then go to the window option at the top and click on the symbols as shown in the image below
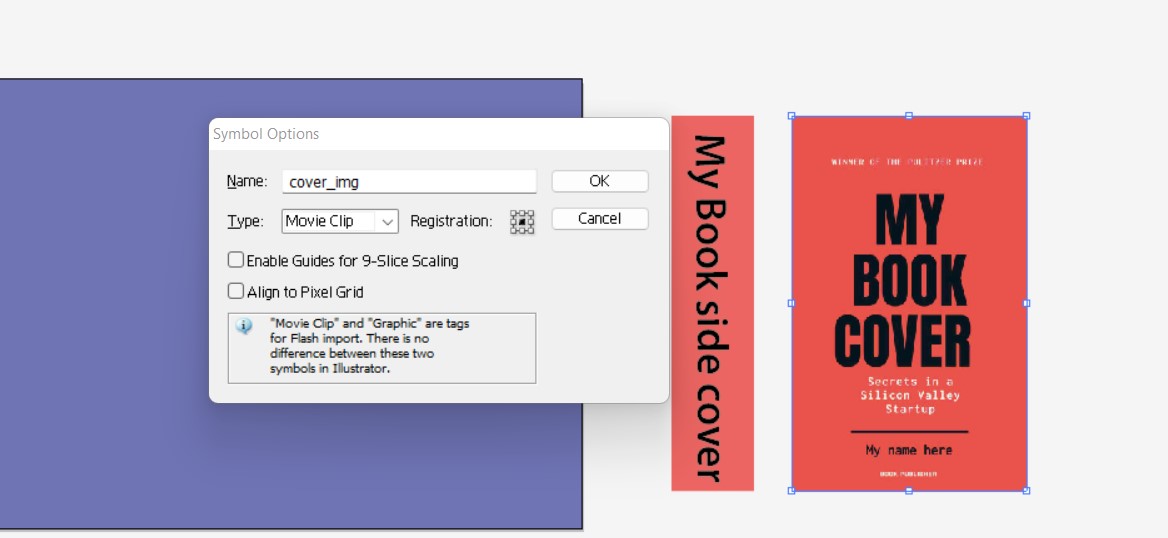
Now we will select the cover image and then press the shortcut F8, after which a window will appear to name the symbols, we will put any name and click OK as shown in the image below. likewise
Similarly, we will make the cover image as symbols.
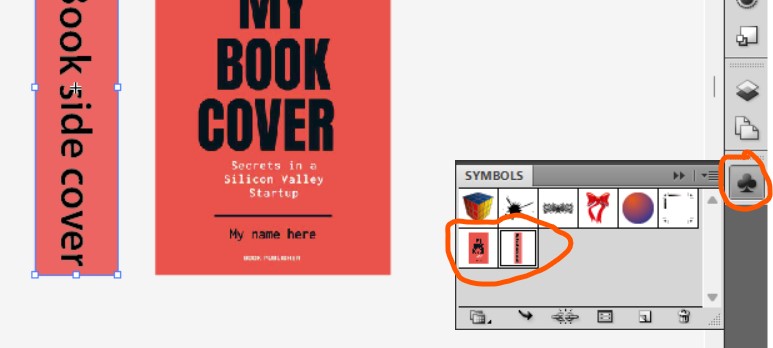
After making both the symbols, we will start seeing them in the symbols as seen in the image. After doing this step, 50% of our book cover design work is done.
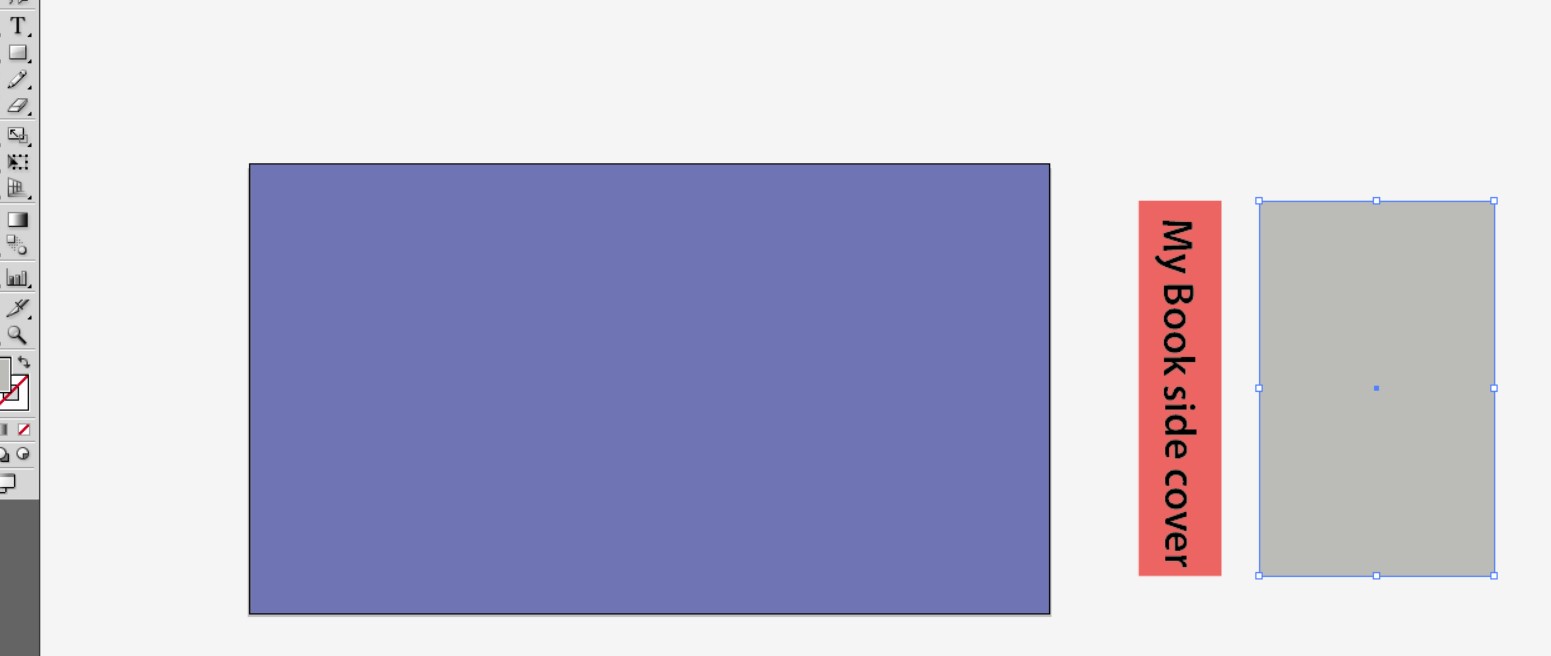
Step 3: Draw a rectangle of the cover image size of the book and Convert it into a 3d shape: So now we will select the Rectangle tool and draw a rectangle the size of the cover poster, something like as shown in the image.
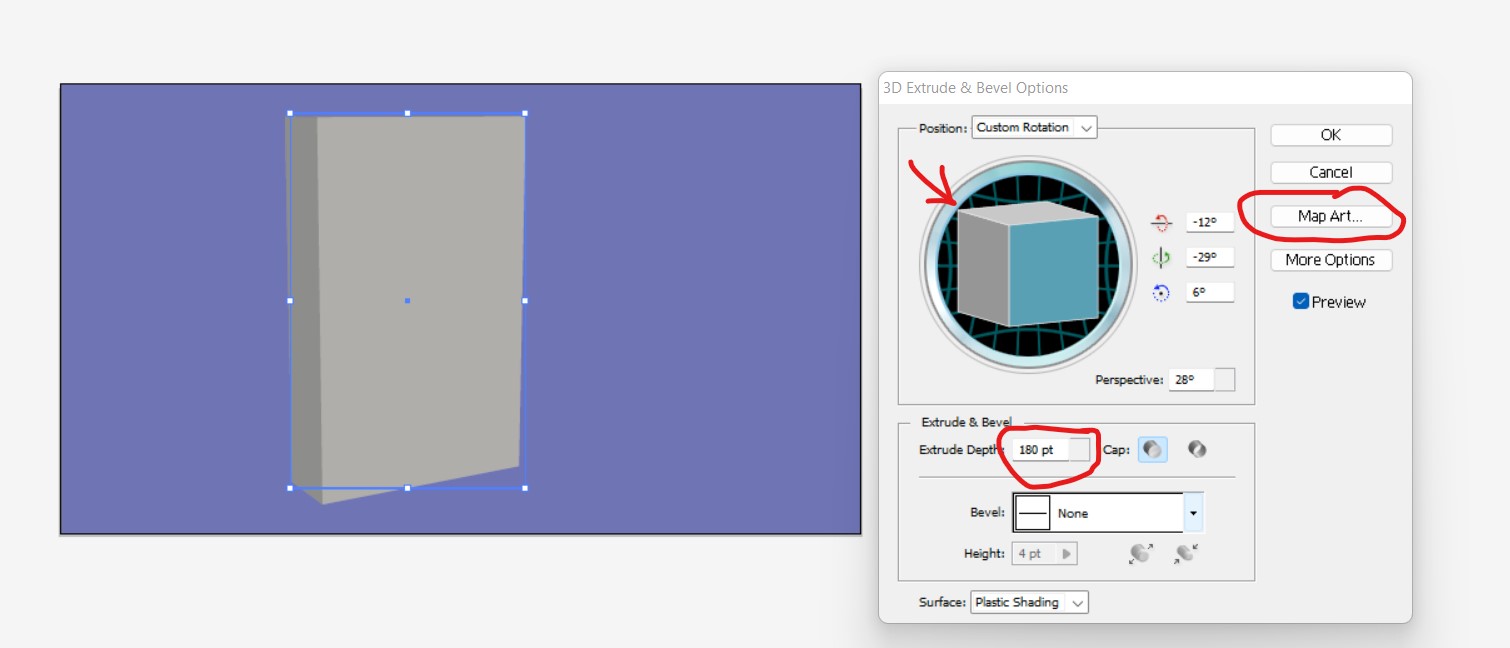
After drawing the rectangle, drag it and put it in the workbook. Now select the rectangle, and go to the effect option, which is visible at the top, there is a 3D option in the effect option, now on bringing the mouse to the 3d option, the option of Extrude & Bevel will come, click on it.

After clicking on Extrude & Bevel, a window will open as shown in the image below, in this we will click on Preview so that whatever we change, we can see it before doing OK. Now here is an option to extrude depth whose default value is 180 pixels, we will increase this to the width of the side cover image and then rotate the perspective to 28 degrees.
Here there is a 3d square to rotate the 3d body, through which we can rotate the drawn rectangle in all three directions x y z.
Here is a Map Art option with the help of which we will patch the cover image on the 3d design book, we will do this in the next step
Step 4: patch book cover image and side cover image on 3d shape: So our 3d object of the book is ready now we will patch our book cover image and side cover image on it
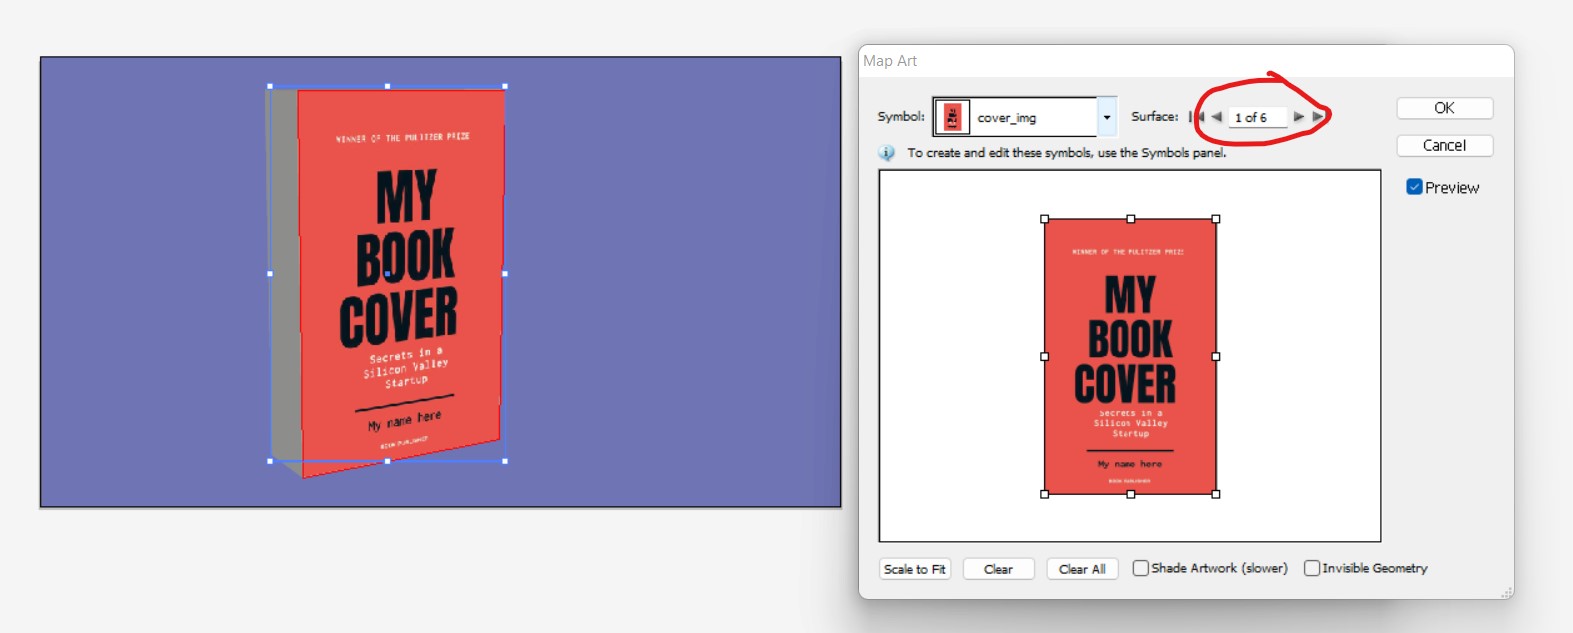
In the above image, you can see that there is a map art option, we will click on it, and after clicking the map art window will open as seen in the image below. In Map Art, we can select each surface of a 3d object and apply symbols to it and we have already created cover images and side cover images as symbols.

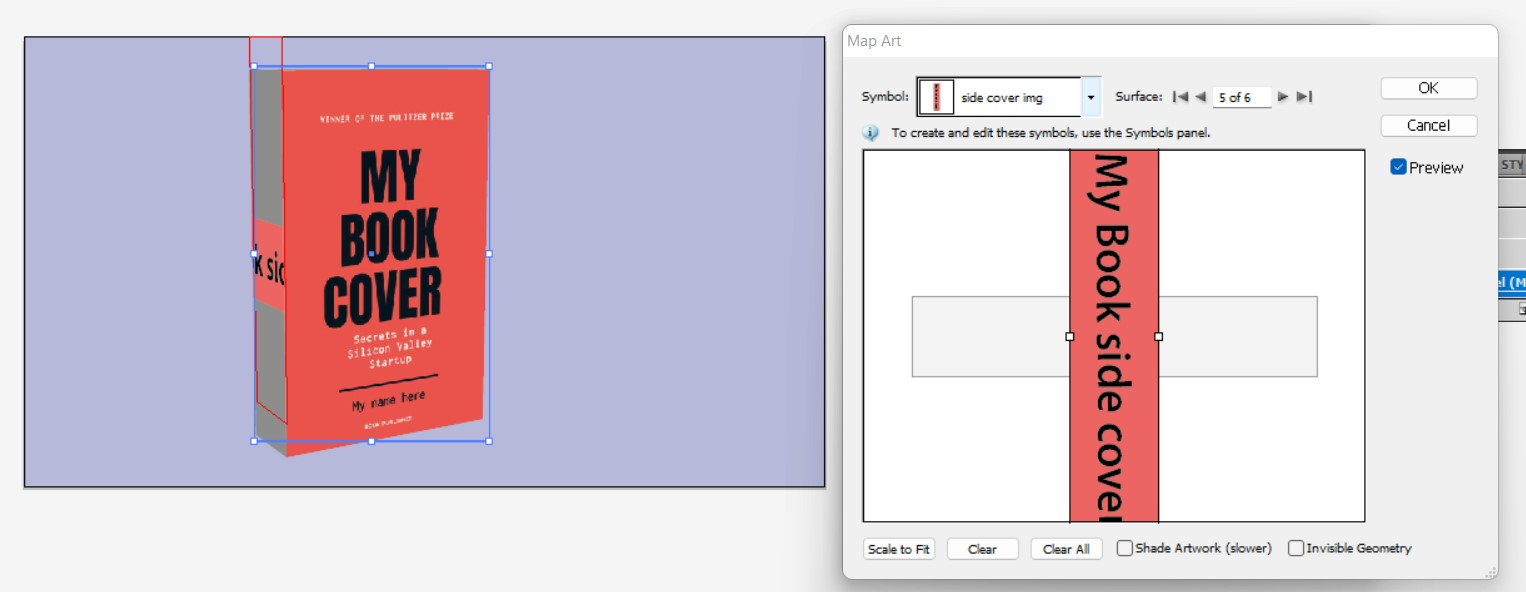
So from the Surface option at the top of the map art, select the front surface of the 3d object and then go to Symbols and select the cover image. While selecting the cover image, our cover image will be patched, then in the same way we will select the side surface of the 3d object which is coming at number 5 in the surface option, then go to the symbols and select the side cover image
So here a problem is coming, the side cover image is not getting patched properly because the side surface is 90 degrees in a different direction, to fix this, move the mouse to the corner of the side image where the option of rotating will come, with the help of which We will rotate the image and fix it on the side surface in the right way.
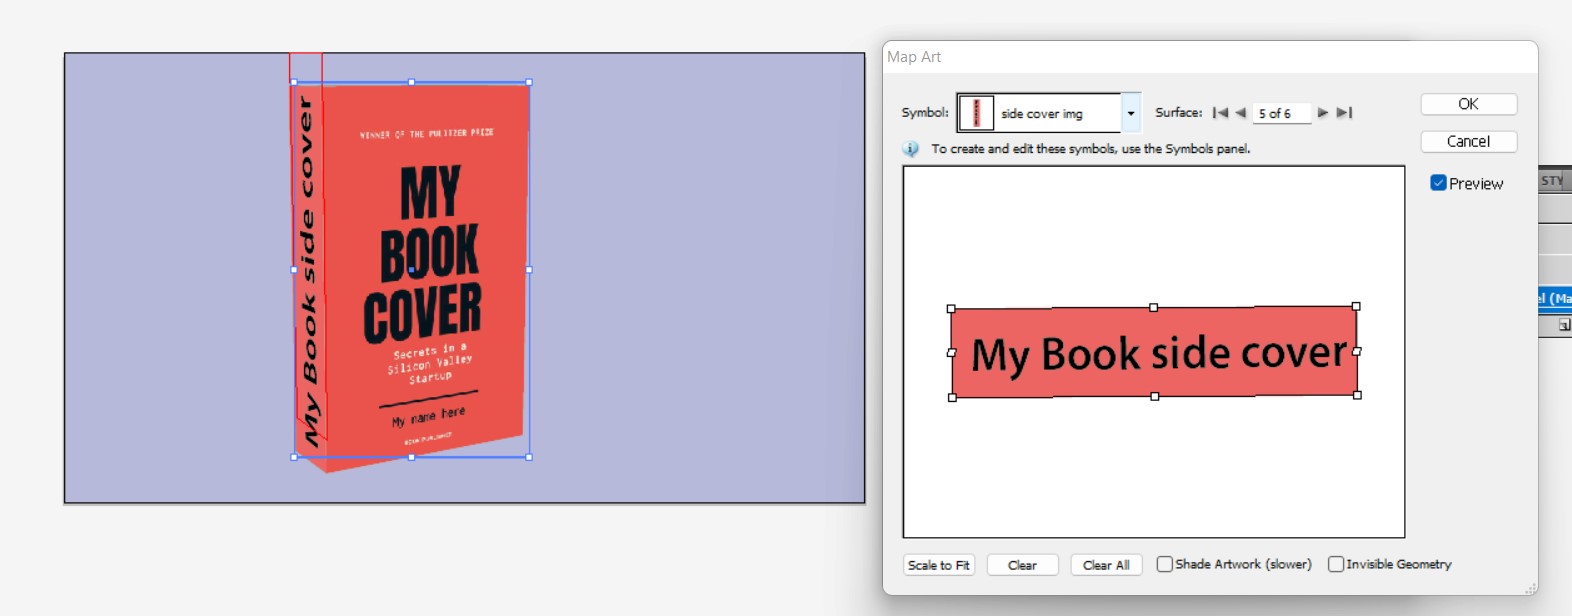
So finally our cover design book is ready
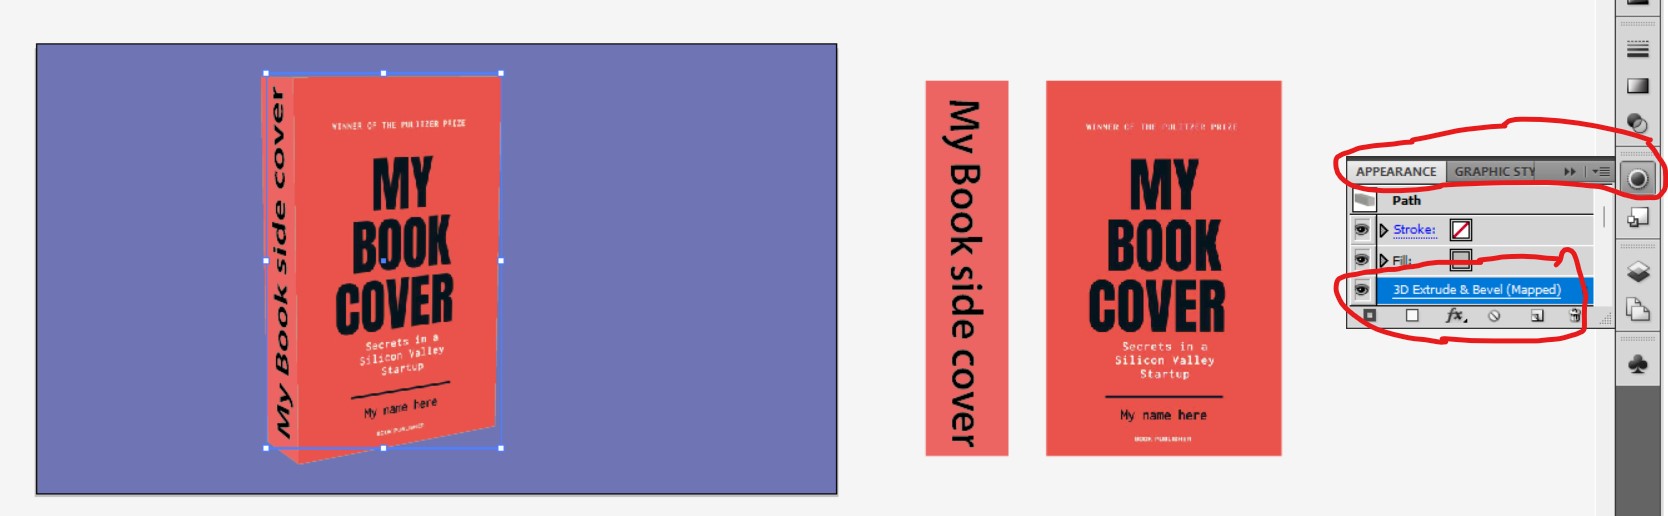
But there is a question if we have to change something in the 3D option, what will we do?
It is very simple, select the 3d object and go to the Appearance option on the right side and there is also the option of 3d Extrude & Bevel as seen in the image below., clicking on it will go to the 3d option of Map Art.
Second question, can I put another cover image?
The answer is yes, but first, it has to be made of AS symbols and its size and width should be equal to the first image.
This is our Illustrator file of the cover design of images that will work as a template.
So in this article, we learned how to make digital 3D designs of anything. We made a cover design of the book as an example. thank you for reading it with so much patience, I hope you learned it and enjoyed it